
Post by kenpossum on Jan 17, 2011 22:46:02 GMT -8
Most photo images require some form of post-processing to achieve a quality final appearance. I use Adobe Photoshop for this purpose, but others such as Adobe Lightroom will also achieve the required results. This tutorial is VERY basic, but meets most of what I require to process my images. It does not matter which edition of Photoshop Elements you have, as what is illustrated below can be achieved with all versions. Let's start with an image of a Bewick's Wren. The original image was taken in low, flat light and form a distance. When I first viewed the image, I was inclined to delete it, but I liked the bird's pose, so I thought it might be Photoshopped into an acceptable image.
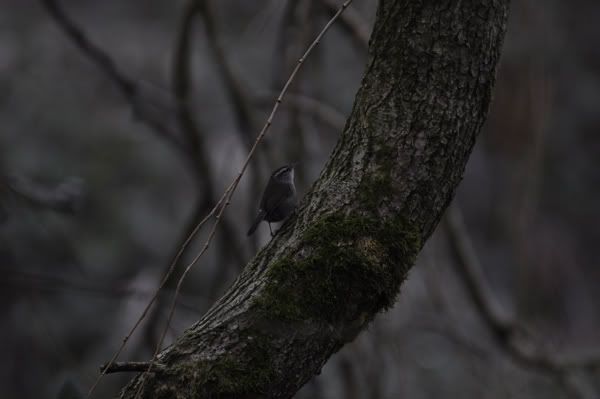
My first step was to click on "ENHANCE " and click on "Auto Color Correction". This will restore lost colour due to the poor lighting conditions. The results in this image were excellent, but other images may not show an improvement, and the 'EDIT/ Undo" will take you back where you started. I always experiment with the "Auto Color Correction" with every image.
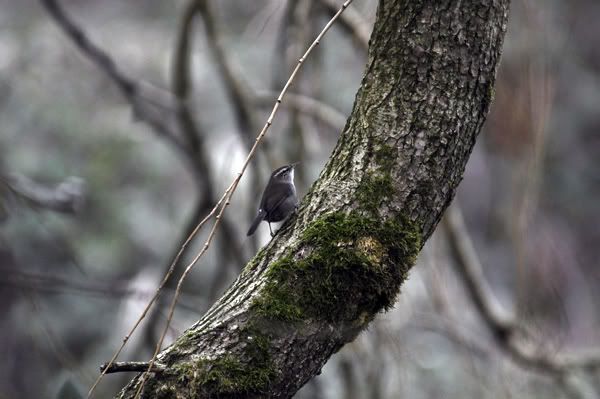
Next I go to the vertical menu bar or palette and select the crop tool to recompose the image. When focusing on a bird with my camera, I use the centre spot focus to quickly capture and focus the bird. A centered bird is usually not the best composition, so by using the crop tool I can accomplish two things - place the bird off centre for better composition, and also zoom in for a tighter view.
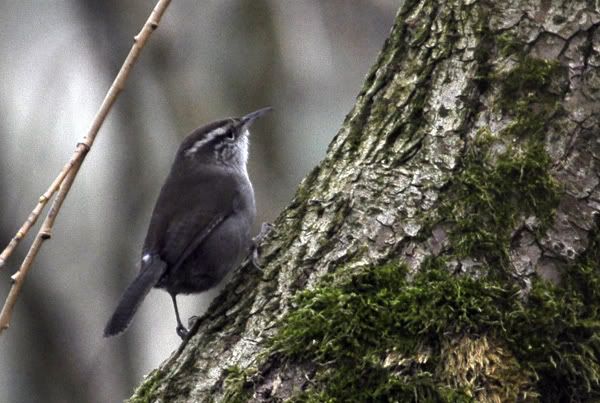
There is a distracting branch to the left of the bird, and I now used the Clone tool in the vertical palette box to remove it. This tool is difficult to explain in print how to use it, so if you have problems contact me by phone (604-858-0544).
Finally, I go to "ENHANCE" once more and click on "Adjust Lighting". I often like to increase the contrast in my images, and play with the final exposure. If you add contrast, the dark areas in the image may go too dark, and require a slight overexposure. I prefer a slight underexposure to overexposure.
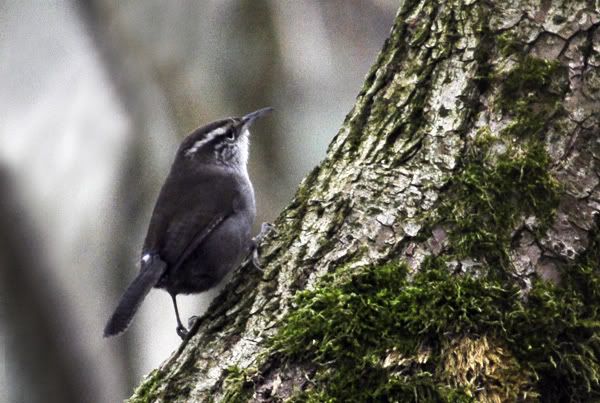
Sometimes, if the image is a little 'soft' I go to "ENHANCE" again, and click on "Auto Sharpen". This will usually increase the 'noise' in the image, so if you do not get the results you want, go back to "EDIT / Undo"
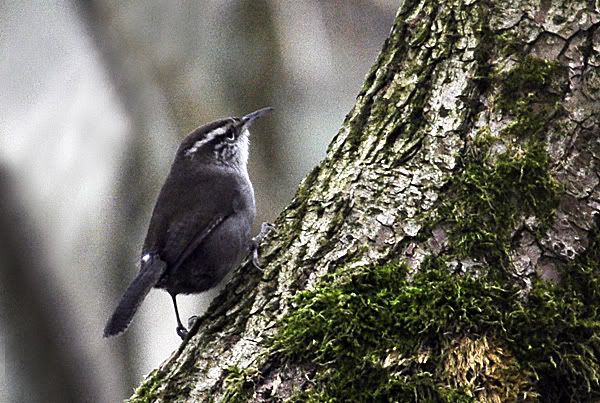
This tutorial is very basic and probably covers only 5% of what Photoshop is capable of. Ken Pugh
My first step was to click on "ENHANCE " and click on "Auto Color Correction". This will restore lost colour due to the poor lighting conditions. The results in this image were excellent, but other images may not show an improvement, and the 'EDIT/ Undo" will take you back where you started. I always experiment with the "Auto Color Correction" with every image.
Next I go to the vertical menu bar or palette and select the crop tool to recompose the image. When focusing on a bird with my camera, I use the centre spot focus to quickly capture and focus the bird. A centered bird is usually not the best composition, so by using the crop tool I can accomplish two things - place the bird off centre for better composition, and also zoom in for a tighter view.
There is a distracting branch to the left of the bird, and I now used the Clone tool in the vertical palette box to remove it. This tool is difficult to explain in print how to use it, so if you have problems contact me by phone (604-858-0544).
Finally, I go to "ENHANCE" once more and click on "Adjust Lighting". I often like to increase the contrast in my images, and play with the final exposure. If you add contrast, the dark areas in the image may go too dark, and require a slight overexposure. I prefer a slight underexposure to overexposure.
Sometimes, if the image is a little 'soft' I go to "ENHANCE" again, and click on "Auto Sharpen". This will usually increase the 'noise' in the image, so if you do not get the results you want, go back to "EDIT / Undo"
This tutorial is very basic and probably covers only 5% of what Photoshop is capable of. Ken Pugh

